Another Glenwood Modern Oak 116

 
Steelhorse
Member
Posts: 23
Joined: Wed. Oct. 03, 2012 9:25 pm
Location: Wilbraham, MA
Hand Fed Coal Stove: Glenwood MO 116
Coal Size/Type: Bulk Nut

Post by Steelhorse » Fri. Sep. 13, 2013 1:18 pm

Alright...it's been a while. I'll catch up.

I gave the winter a break researching and gathering info here on the site from you fantastic guys who have trudged through this before me. I spoke with Emery and he suggested going with a new cast pot. SO...off to Tomahawk it went and what came back was excellent quality. I dropped off the piece in late spring to Emery and Brandon and tomorrow I'm going to pick it up.
I'll be getting the plating done locally, so that'll take another couple weeks, but I'll get some pics up of the stove tomorrow.

:D Very Excited!


User avatar
nortcan
Member
Posts: 3146
Joined: Sat. Feb. 20, 2010 3:32 pm
Location: Qc Canada

Post by nortcan » Fri. Sep. 13, 2013 1:22 pm

Tomorrow, hum very long time to wait for you but also for us :) :D :lol:

 
User avatar
wsherrick
Member
Posts: 3744
Joined: Wed. Jun. 18, 2008 6:04 am
Location: High In The Poconos
Hand Fed Coal Stove: Glenwood Base Heater, Crawford Base Heater
Baseburners & Antiques: Crawford Base Heater, Glenwood, Stanley Argand
Coal Size/Type: Chestnut, Stove Size

Post by wsherrick » Mon. Sep. 16, 2013 1:49 am

Excellent. Keep us updated. You are going to love your stove. Plus, you did the right thing by letting Emery and Brandon do the work. Now you will have a like new perfect stove.

 
User avatar
SteveZee
Member
Posts: 2512
Joined: Wed. May. 11, 2011 10:45 am
Location: Downeast , Maine
Hand Fed Coal Stove: Glenwood Modern Oak 116 & Glenwood 208 C Range

Post by SteveZee » Sun. Sep. 22, 2013 11:48 am

Outstanding! :D

 
Steelhorse
Member
Posts: 23
Joined: Wed. Oct. 03, 2012 9:25 pm
Location: Wilbraham, MA
Hand Fed Coal Stove: Glenwood MO 116
Coal Size/Type: Bulk Nut

Post by Steelhorse » Mon. Sep. 23, 2013 9:15 am

Ok, I've been running around all week....but here's some pics as promised!
Image
Image
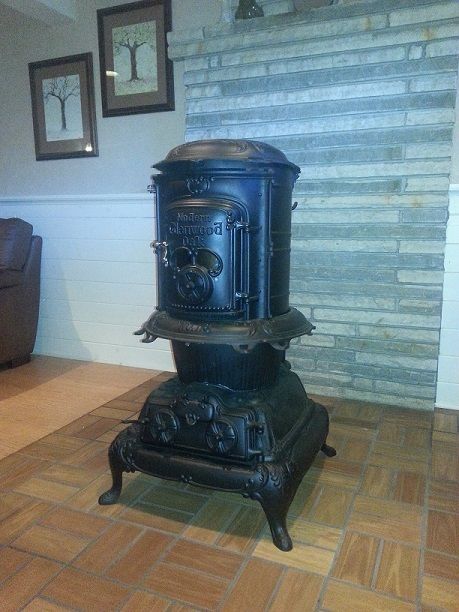
Here she is as she'll sit...without the shine, of course. I dropped off the pieces to get plated last Friday and should have them in about two weeks.
Image
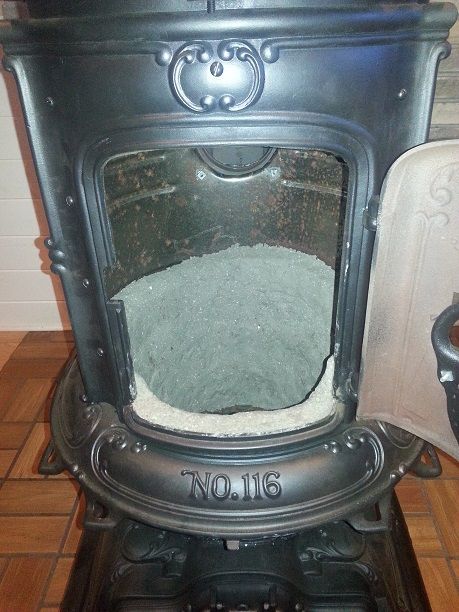
A nice, thick layer of refractory material waiting to get burned in!
Image
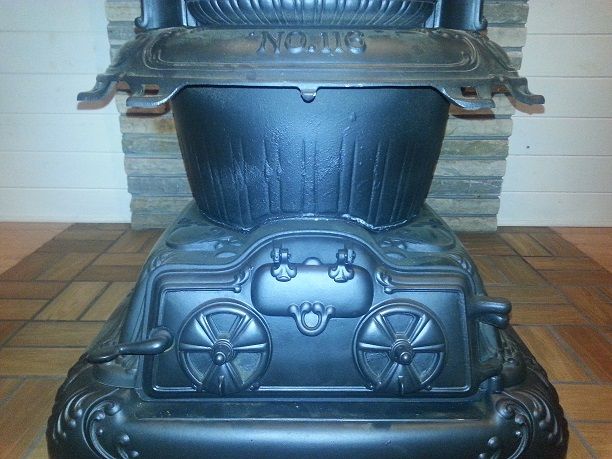
The new pot, recast by Tomahawk. I didn't bother to take the casting flash off...that's my fault. Maybe I'll tackle that next year and repaint...maybe I won't - you barely see it when the skirts are off, and don't at all when they're on.
Image
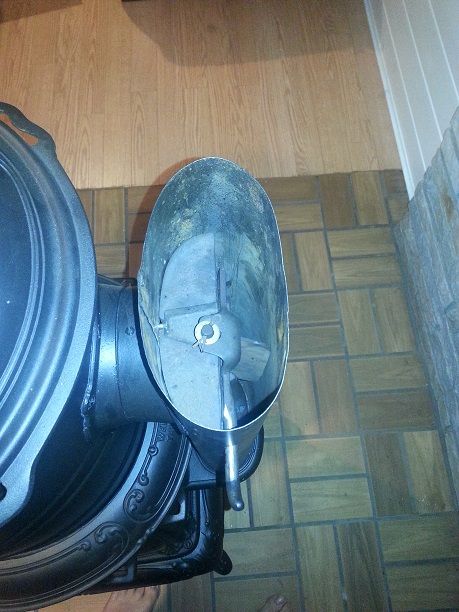
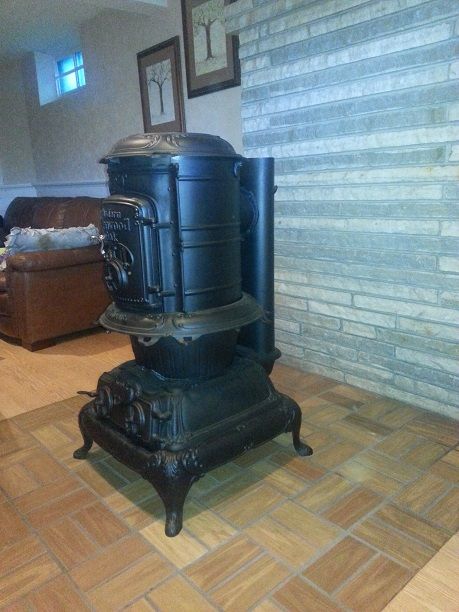
Emery made a brand new flue column, as the old one was seemed on the wrong side and, as he informed me, was also made of galvanized steel...glad I never used it. The original internals were reused.
Image
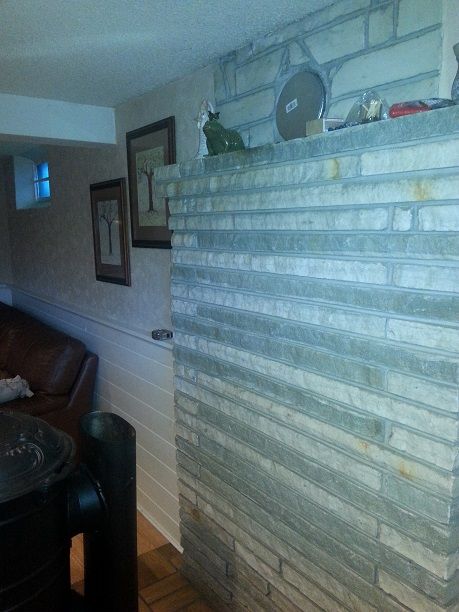
So here's my dilemma. I originally told Emery that I was going to shoot the flue straight up, as the old pipe was made, seeing how I had a good rise to overcome as seen above. I'm reconsidering now, and thinking I might go straight out the back of the column, run a 90° up and another 90° straight out as I've seen most of you have done. I'm confident I can cut down the column to the correct height and fabricate a cap. What I'm having a problem deciding is how to run the pipe. As you can see, the clearance to the ceiling is at minimum, so I need the top elbow and straight pipe to be double walled, per code. I don't want to run DW pipe the full length for I know that will decrease the heat transfer. So I need some opinions and advice.
So, without further ado, the question session:
First - The hole through the masonry is 8", with no relief in the masonry...I know these stoves (at least my model) have a 6" exit at the column. So do I run an increaser near the column and run 8" from the bottom elbow up or put the increaser at the masonry and run 6" the full length?
Second - Does anyone know if there's anything fancy made to go from single wall to double wall? The lower elbow and vertical pipe will be SW and the upper elbow and horizontal to the masonry will be DW. I can't seem to find anything to make it look pretty, and am on the verge of succumbing to there being a stepped joint at the bottom of the upper elbow.
Third - With nothing to secure the pipe going into the masonry, would it be sound advice to run a reasonable length of 8" SW (maybe 6-8" with a minimal amt to affix to) into the masonry to give the DW adapter or straight pipe to screw onto?
Fourth - For the SW pipe: Snap-lock or welded?
Fifth - Is it worth it to install a damper in the vertical pipe?
Lastly - I'll be using furnace cement regardless, but crimps up or down with coal? I know they're supposed to be down with wood...didn't know if there's a difference.

Any and all responses are much obliged! All you guys have helped me out a bunch just by posting here, whether you know it or not! Thanks!!

 
franco b
Site Moderator
Posts: 11417
Joined: Wed. Nov. 05, 2008 5:11 pm
Location: Kent CT
Hand Fed Coal Stove: V ermont Castings 2310, Franco Belge 262
Baseburners & Antiques: Glenwood Modern Oak 114
Coal Size/Type: nut and pea

Post by franco b » Mon. Sep. 23, 2013 10:01 am

Too complicated for something that needs periodic replacement and to be taken down for cleaning, also you want minimum expense.

Run single wall 6 inch all the way. At the thimble fill in the gaps with brick rubble or fiberglass and then cement over to hold in place. Snap lock is cheapest. Crimp up or down whatever is more convenient.

For heat shield on the horizontal pipe use a trimmed down section of smoke pipe half round and resting on horizontal pipe and spaced out 1 inch with machine screws and nuts, not fastened to under pipe but just resting on it. If you wish you can make a second flat heat shield for ceiling and painted to match or just use one or the other or both.

If your chimney is subject to wide swings in draft then a baro is best, otherwise a manual damper is OK, but bear in mind the act of using the indirect pipe is a damper of sorts in that it will lower draft as well owing to the increased flue path. A permanent manometer is nice to see what is going on with the draft.

You should have the indirect pipe as originally configured to allow full 6 inch opening when desired at start up and other times. As it is now the flue opening is restricted at all times. You will need another flange to do this.

 
User avatar
wsherrick
Member
Posts: 3744
Joined: Wed. Jun. 18, 2008 6:04 am
Location: High In The Poconos
Hand Fed Coal Stove: Glenwood Base Heater, Crawford Base Heater
Baseburners & Antiques: Crawford Base Heater, Glenwood, Stanley Argand
Coal Size/Type: Chestnut, Stove Size

Post by wsherrick » Mon. Sep. 23, 2013 4:55 pm

As franco said. Simple 6" stove pipe will work fine. You really don't need all the extra heat protection. The stove pipe on that stove with coal will never exceed 300 degrees even in direct draft and a roaring fire. When it is running in indirect draft mode, you will be able to hold you hand on the upper portions of the stove pipe. The upper portions of the stove pipe will be around 150 degrees or so. Put in a standard pipe damper about 2 feet or so from the top of the exhaust collar and be done with it.

Do you have the cap for the top of the back pipe and the iron collar for the exhaust exit? If so, put them on.


Steelhorse
Member
Posts: 23
Joined: Wed. Oct. 03, 2012 9:25 pm
Location: Wilbraham, MA
Hand Fed Coal Stove: Glenwood MO 116
Coal Size/Type: Bulk Nut

Post by Steelhorse » Mon. Sep. 23, 2013 5:06 pm

Thanks guys. Wm - I was thinking the same thing about the heat. I think I'll use the idea of the extra sheet resting with screws to appease the fire inspector, cause when I spoke to him he already claimed my stove was not very efficient and nowhere near airtight. I don't want to start an argument with the guy I need to sign off on it.
I have approx 7" from ceiling to pipe... so I'm not too worried, I just want to get clearance from the town so my insurance co can be happy.

 
User avatar
wsherrick
Member
Posts: 3744
Joined: Wed. Jun. 18, 2008 6:04 am
Location: High In The Poconos
Hand Fed Coal Stove: Glenwood Base Heater, Crawford Base Heater
Baseburners & Antiques: Crawford Base Heater, Glenwood, Stanley Argand
Coal Size/Type: Chestnut, Stove Size

Post by wsherrick » Mon. Sep. 23, 2013 5:19 pm

Steelhorse wrote:Thanks guys. Wm - I was thinking the same thing about the heat. I think I'll use the idea of the extra sheet resting with screws to appease the fire inspector, cause when I spoke to him he already claimed my stove was not very efficient and nowhere near airtight. I don't want to start an argument with the guy I need to sign off on it.
I have approx 7" from ceiling to pipe... so I'm not too worried, I just want to get clearance from the town so my insurance co can be happy.
There's no fixing stupid and the stubbornly ignorant. Especially when it is wrapped up in a Bureaucrat with a clipboard. The mere thought of someone like that in my home telling me what to do is enraging.

 
Steelhorse
Member
Posts: 23
Joined: Wed. Oct. 03, 2012 9:25 pm
Location: Wilbraham, MA
Hand Fed Coal Stove: Glenwood MO 116
Coal Size/Type: Bulk Nut

Post by Steelhorse » Tue. Sep. 24, 2013 12:33 am

Ok, I was able to source all of the SW pipe I need from Home Cheapo, now all I need is an exhaust flange for the back side of the column. Anyone have any sources for such a beast? I've searched through a few pages on google and either can't find what I'm looking for or I'm not searching the correct term.

 
franco b
Site Moderator
Posts: 11417
Joined: Wed. Nov. 05, 2008 5:11 pm
Location: Kent CT
Hand Fed Coal Stove: V ermont Castings 2310, Franco Belge 262
Baseburners & Antiques: Glenwood Modern Oak 114
Coal Size/Type: nut and pea

Post by franco b » Tue. Sep. 24, 2013 11:03 am

I think your best bet is to speak to Emery at Stove Hospital.

 
Steelhorse
Member
Posts: 23
Joined: Wed. Oct. 03, 2012 9:25 pm
Location: Wilbraham, MA
Hand Fed Coal Stove: Glenwood MO 116
Coal Size/Type: Bulk Nut

Post by Steelhorse » Tue. Sep. 24, 2013 2:39 pm

I know Emery will have the answer...just looking to keep the man's downtime to a minimum. I know there's a few guys on here that have done their own restos and I Emery and Brandon are pretty darn busy right now!

I'll give it a couple days before I give them a call.

 
Steelhorse
Member
Posts: 23
Joined: Wed. Oct. 03, 2012 9:25 pm
Location: Wilbraham, MA
Hand Fed Coal Stove: Glenwood MO 116
Coal Size/Type: Bulk Nut

Post by Steelhorse » Thu. Nov. 21, 2013 9:21 am

So here's the final reveal!

I've been busy getting the plating done and having the chimney lined (which was a wonderful unexpected cost), but everything came together on Tuesday night. I had the town inspector swing by yesterday morning to look everything over and started her up for the first time around 1030am.

I smoked the house out for about two hours on wood getting it up to about 450-500, making sure to run the indirect draft to get all the cement up to temp.

Around 1230p I added my first load of coal to the smouldering wood embers. Spent the next hour or so dialing it in to sit indirect at 400 degrees. At 430p I filled it up level with the top of the fire lining and let it go. I kept checking back to see if the temp spiked or sank (as I would with my old wood stove) but was sorely disappointed (and thrilled) in the lack of maintenance needed! I turned the temp down to 350 at about 8p which set the top of the stack at about 150...which was right where I wanted it. It sat at that level all night.

This morning the kids let us sleep in and about 20 minutes ago, after a 15 hr burn I was happy to still see some hot coal in the pot surrounded by ash. Just enough to throw a shovel full on and get the ball rolling again. The barrel was down to 150 degrees...so now I think I know my max burn (depending on weather conditions, of course).

Attachments

first burn.jpg
.JPG | 162.3KB | first burn.jpg

 
User avatar
Sunny Boy
Member
Posts: 25749
Joined: Mon. Nov. 11, 2013 1:40 pm
Location: Central NY
Hand Fed Coal Boiler: Anthracite Industrial, domestic hot water heater
Baseburners & Antiques: Glenwood range 208, # 6 base heater, 2 Modern Oak 118.
Coal Size/Type: Nuts !
Other Heating: Oil &electric plenum furnace

Post by Sunny Boy » Thu. Nov. 21, 2013 10:49 am

Congrats. Great job and it looks beautiful. It's terrific to see another old stove brought back to life !!!!

I think it's smart to keep the inspector happy. If there's ever a problem, guess who your home owner insurance company is going to side with ? Or, the bank , if there's a mortgage on the house. And, if you ever change insurance companies, the questions come up all over again. It's great to be able to show the inspector signed off on the installation. ;)

I hope my 118 turns out looking near as good.

If I may ask, where did you get the nickel plating done ?

Paul

 
Steelhorse
Member
Posts: 23
Joined: Wed. Oct. 03, 2012 9:25 pm
Location: Wilbraham, MA
Hand Fed Coal Stove: Glenwood MO 116
Coal Size/Type: Bulk Nut

Post by Steelhorse » Sat. Nov. 23, 2013 1:54 am

You're exactly right about the inspector! The exact reason I did what I did. If something should ever happen I want my family and I to be covered.

I had the plating done at D&S Plating in Holyoke, MA. (413)533-7771 Ask for Mickey.
His turn around time varies depending on the work load he has, but he knocked my job out in three weeks.

I can't say any bad about it...it's all a mirror finish. I was originally missing one of the four of the top ring and I was able to get a piece from Emery, but it was very pitted and in rough shape compared to the originals I had. Now, I can't even tell which one it was...that's how good of a job he did.

He did spend quite a bit of man-hours on it, but his price was fair and I like supporting local business (he's only about 15 miles from me).

So, performance wise...this thing is amazing!

It only ran out to two smouldering coals this past morning, so I had to shake down and do a restart with some kindling, but now that the house has absorbed heat for a straight 48 hrs I have to run it low, around 300-350 to maintain comfy temps. Mind you, I have a +1800 sqft raised ranch with a split level entry that has a ceiling fan at the stairs to carry the heat upstairs. The thermostat at the top of the stairs is currently reading 80° and I had to close the bedroom doors to make it comfortable to sleep! Ha! I've even opened the downstairs door to my non-insulated utility room from time-to-time to bleed off some heat.

So if you have a 118, I hope you have some more square footage to heat, cause that baby is gonna roar!

Best of luck, Sunny Boy!


Post Reply

Return to “Antiques, Baseburners, Kitchen Stoves, Restorations & Modern Reproductions”